MemSQL Streamliner will be deprecated in MemSQL 6.0. For current Streamliner users, we recommend migrating to MemSQL Pipelines instead. MemSQL Pipelines provides increased stability, improved ingest performance, and exactly-once semantics. For more information about Streamliner deprecation, see the 5.8 Release Notes. For more information about Pipelines, see the MemSQL Pipelines documentation.
This section walks through a complete example of setting up a basic Streamliner pipeline. This example does not use any custom jar files. The goal of this section is simply to get users to understand the basic components of Streamliner.
Before deploying Apache Spark, it is recommended that you have a MemSQL cluster already set up. For instructions on how to deploy MemSQL, see the Installation Guide section.
1. Deploy Spark
Click on the Spark tab on the left-hand menu. If you have not deployed or connected Spark, you should see something that looks like this:
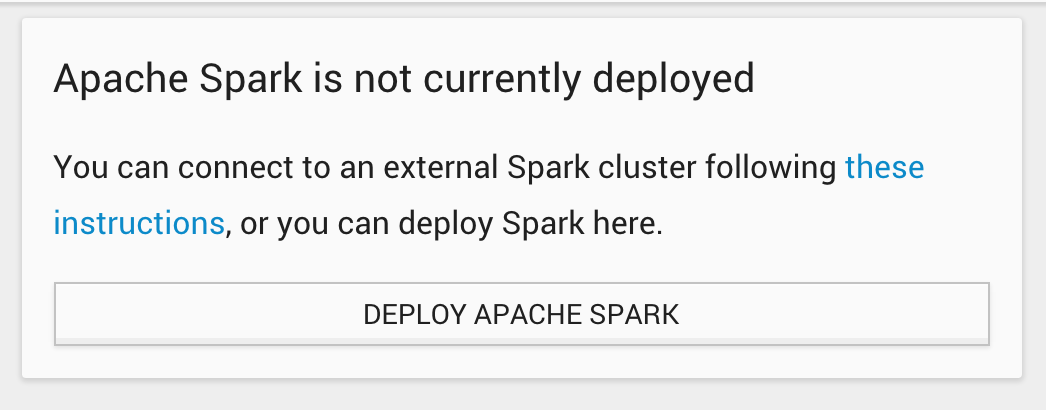
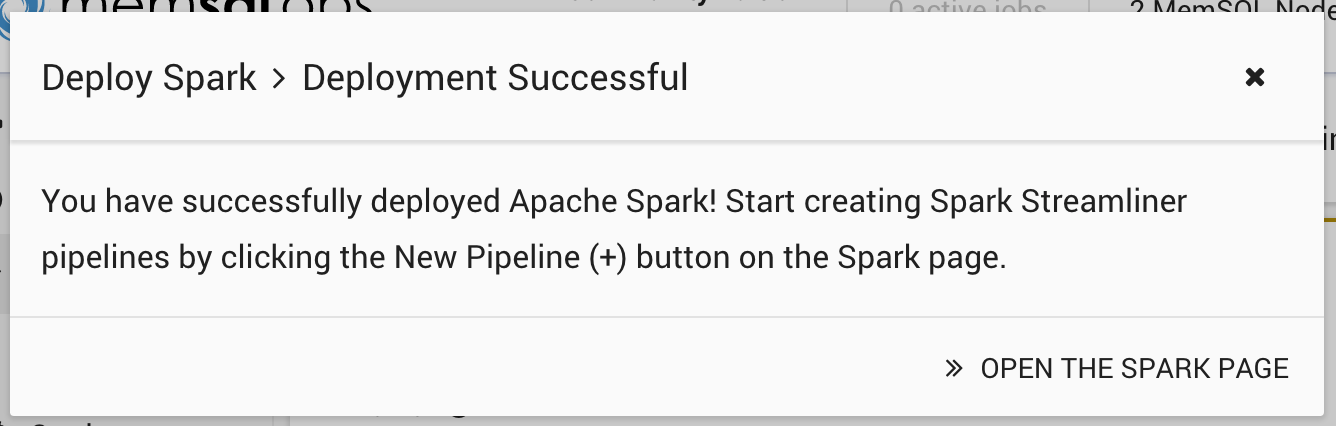
Click Deploy Spark to deploy Apache Spark on all the nodes where MemSQL Ops agents are installed. Once the deployment completes, you should see this:
2. Setup Test Kafka Cluster
The most commonly used Streamliner data source is Apache Kafka. Currently Streamliner only supports Kafka 0.8.2. Setting up Kafka could get complicated on its own, so for novice users, we leveraging the Kafka in Docker container, which is distributed as open source. To run the container locally, you will need to have Docker installed on your machine.
The example Kafka setup section below goes through setting up Kafka on a Mac using Docker Machine. Mac users will need Docker Machine installed on their local system to successfully set up Kafka.
Run the following command to download and start the Kafka container.
docker run -p 2181:2181 -p 9092:9092 --env ADVERTISED_HOST=`docker-machine ip dmachine` --env ADVERTISED_PORT=9092 --name kafka-tester spotify/kafka
You will see the kafka-tester container successfully started when you run docker ps.
Run the following commands to configure the necessary system environment variables:
export KAFKA=`docker-machine ip dmachine`:9092
export ZOOKEEPER=`docker-machine ip dmachine`:2181
From there, you can test that the container works by sending some messages through the kafka-console-* executables. To do so, download the latest version of Kafka here, unpack the file, and navigate to the bin/ folder. From there, start the kafka-console-producer in one console window and the kafka-console-consumer in another.
Start the Kafka producer by running:
./<KAFKA_HOME>/bin/kafka-console-producer.sh --broker-list $KAFKA --topic test
Start the Kafka consumer by running:
./<KAFKA_HOME>/bin/kafka-console-consumer.sh --zookeeper $ZOOKEEPER --topic test
From there you should be able to type text into the producer console which will be emitted in the consumer console.
For the purposes of this demo, stop the kafka-console-consumer process to allow Streamliner to receive all messages you type in the queue.
You can view the full source code for the Docker container used above here.
3. Define a New Streamliner Pipeline
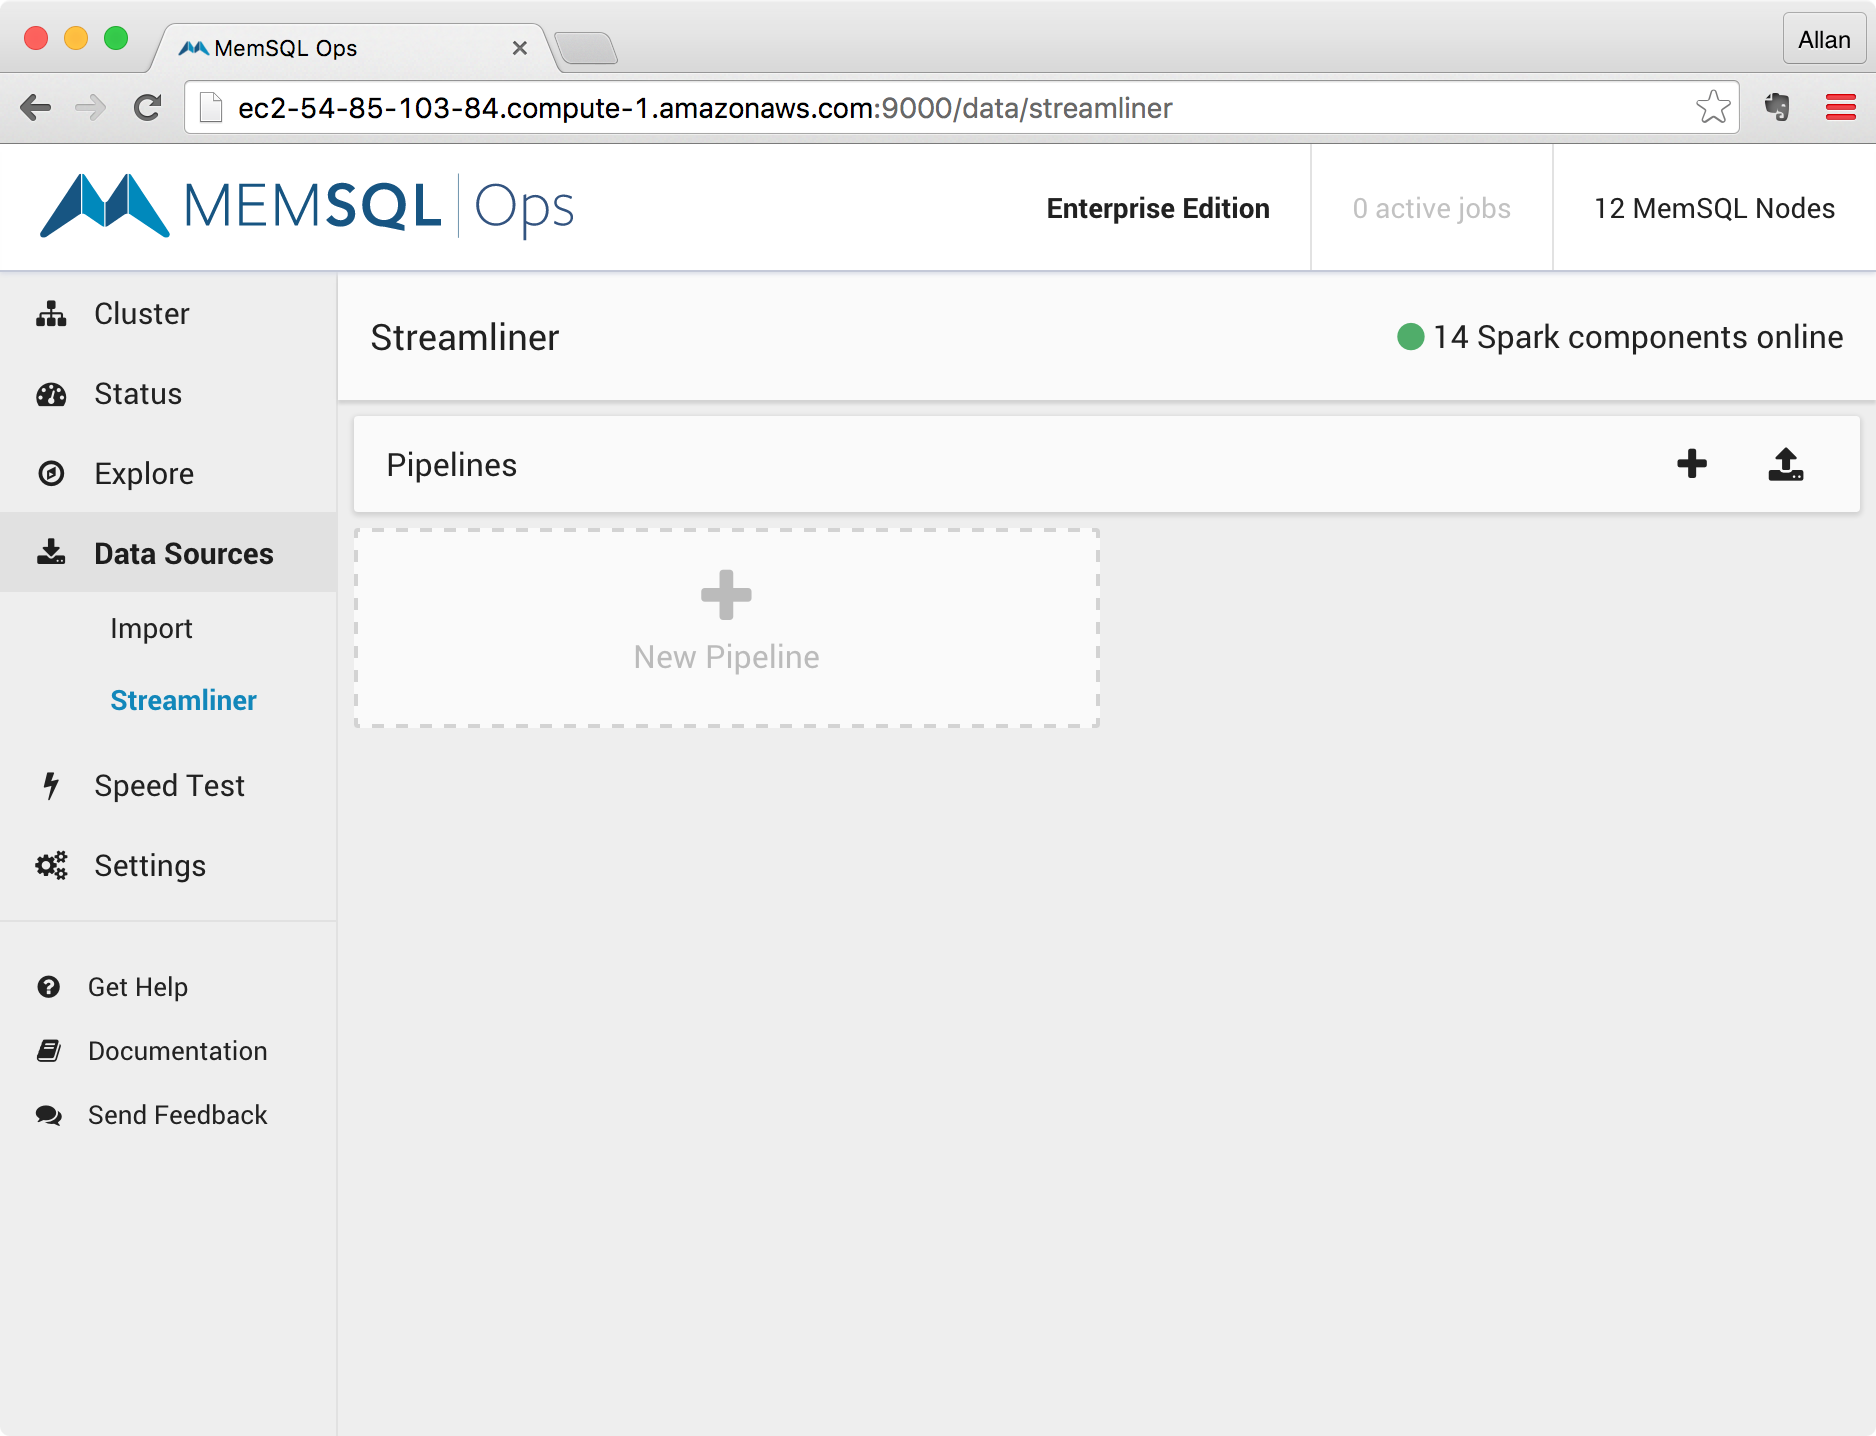
Once you have a working Kafka publisher, and a MemSQL with Spark cluster, define a new Streamliner pipeline by clicking the + New Pipeline button found in the Spark home screen.
Clicking this button will open the New Pipeline screen, where you can define the different phases of your Streamliner pipeline.
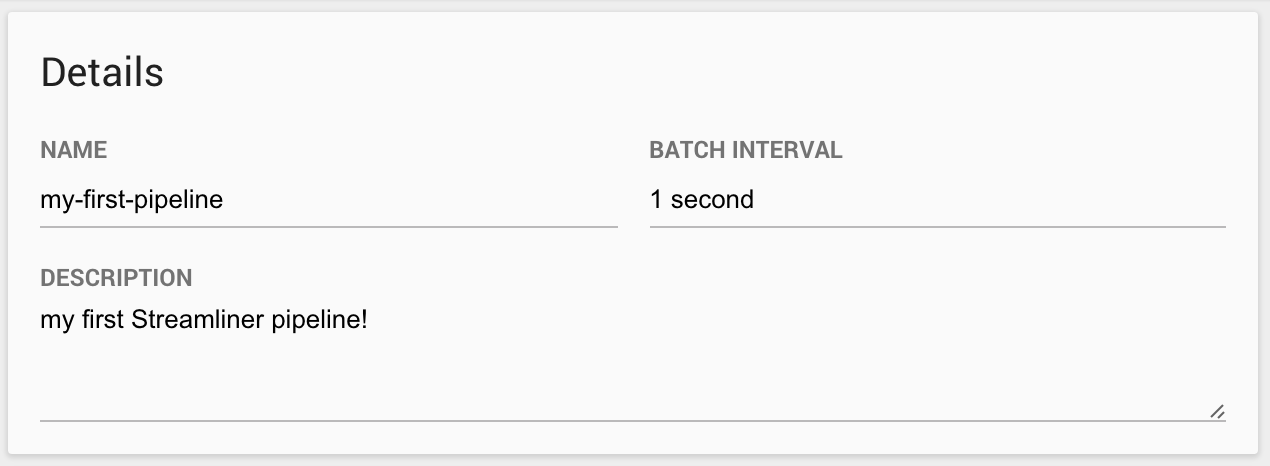
3.1. Define the Pipeline Details
Define the details of the pipeline, which include the pipeline name, description, and batch interval.
The batch interval defines the time interval between each consecutive iteration of the pipeline. Real-time data pipelines are designed to have intervals on the order of seconds.
MemSQL recommends a value between 1 second and 5 minutes.
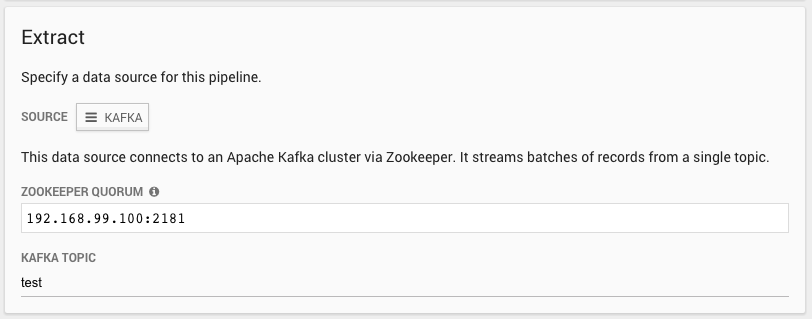
3.2. Define the Extract Phase
Define the data source and configuration parameters for the Extract phase.
If you used the Kafka test cluster described in the optional step, the Kafka host is the IP address of your Docker host, and the topic is test.
The default IP for the Zookeeper Quorum is <Docker Machine Host IP Address>:2181.
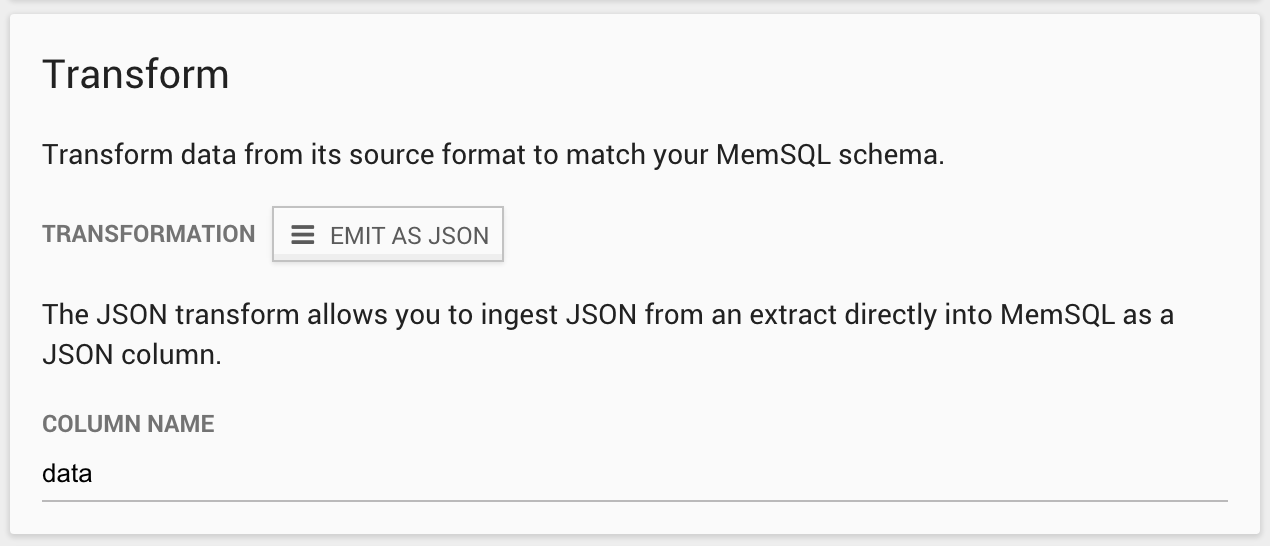
3.3. Define the Transform Phase
Define the transformation to be made on the data coming from the extract phase. The default transformation is Emit as JSON, that takes raw text coming from a Kafka topic and converts it into a JSON column. The Column Name defines the name of the JSON column of the table that will be created in the MemSQL database.
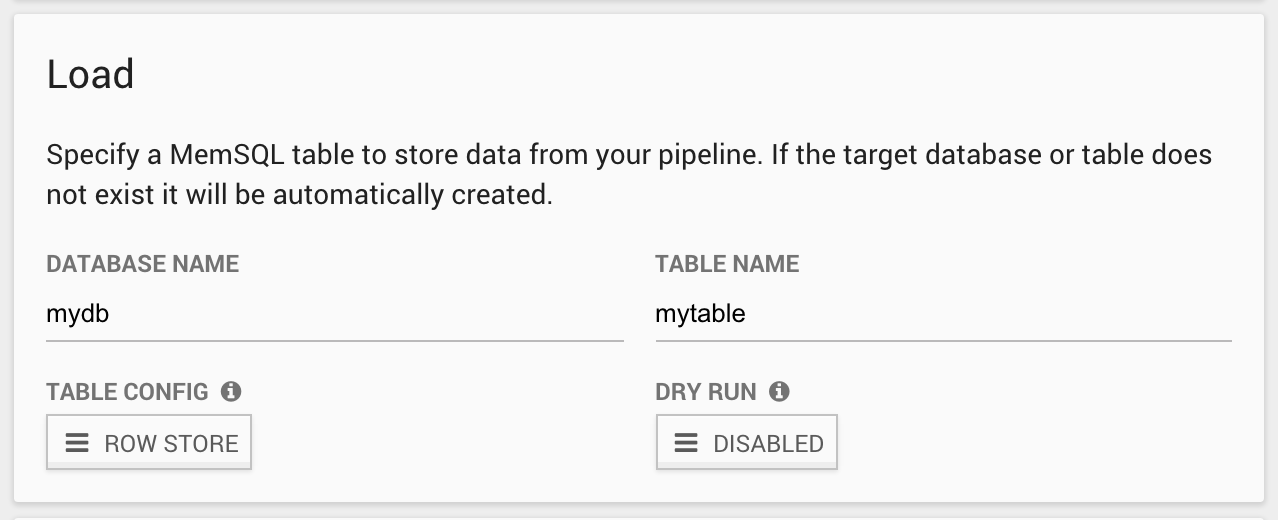
3.4. Define the Load Phase
Define the MemSQL database and table where the transformed data will be stored.
If the database or table does not exist, Streamliner will create the database and the table as a rowstore or columnstore, depending on the option specified. Leave the default Rowstore as the option for now.
4. Run the Pipeline
Click the Save and Run button to start the real-time data pipeline.

5. Verify the Pipeline Works
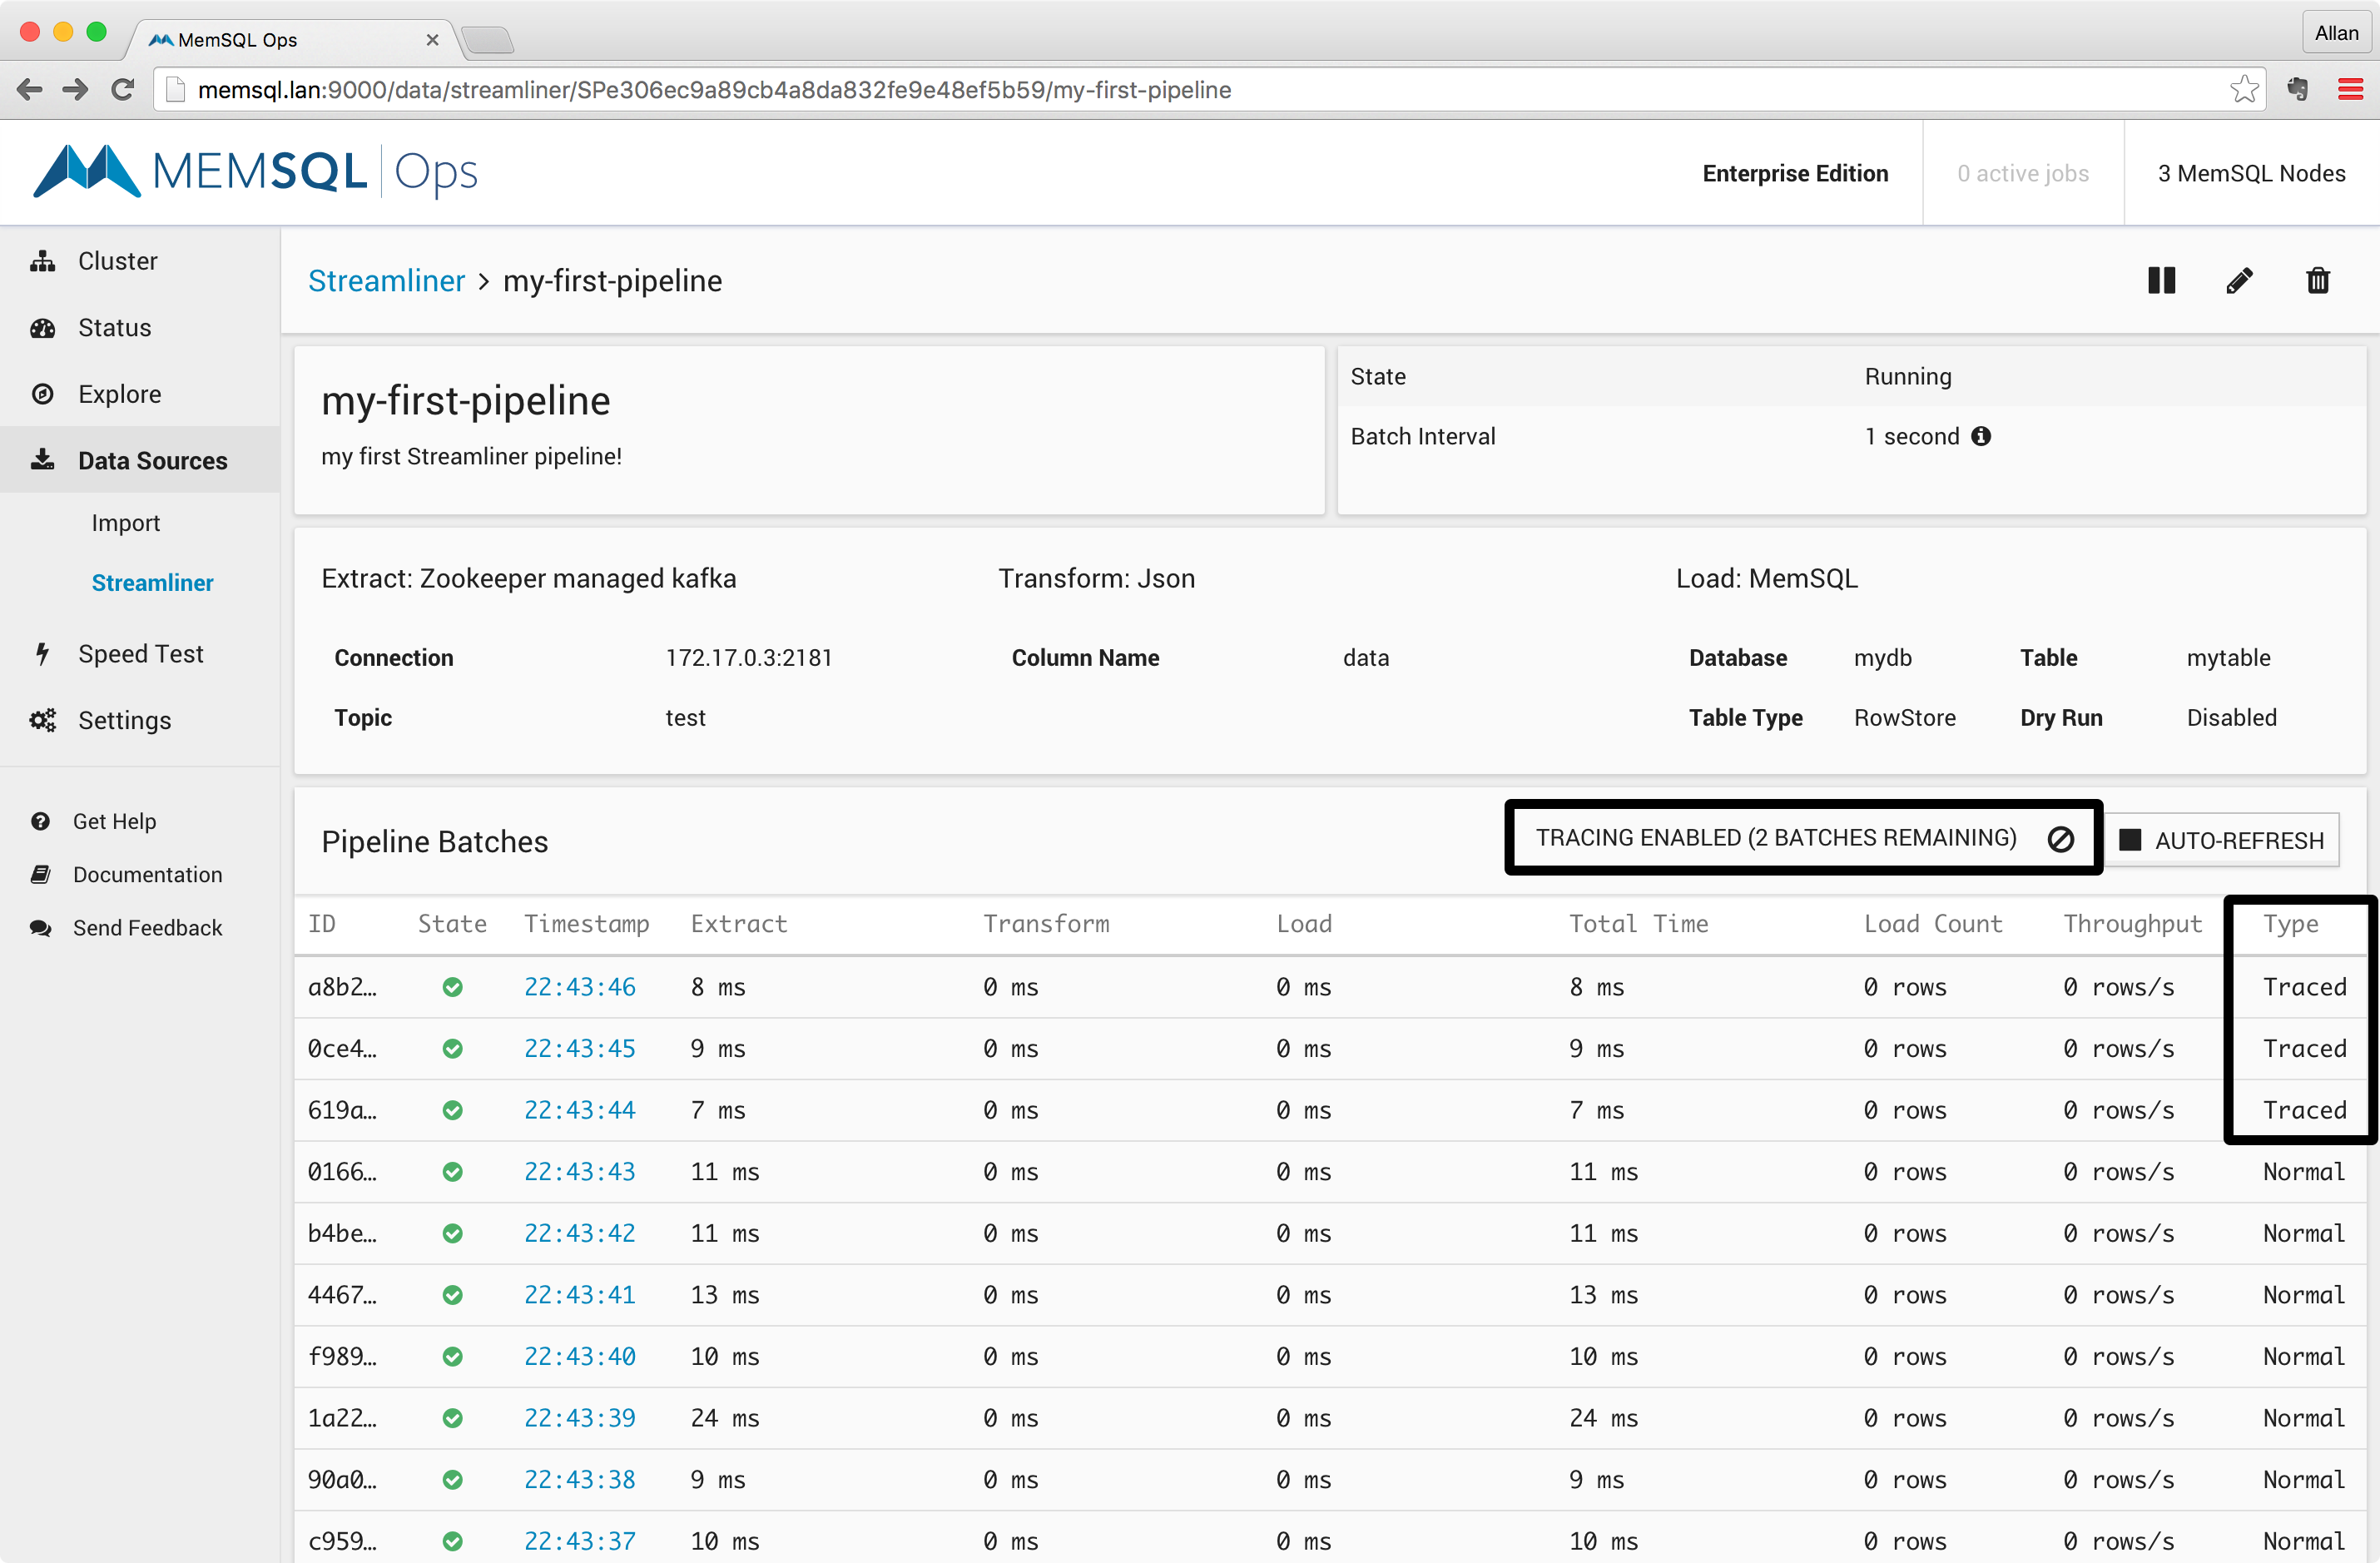
Once the pipeline is saved, you will be redirected to the pipeline home screen where you will find details about your running pipeline, as shown in the screenshot below.
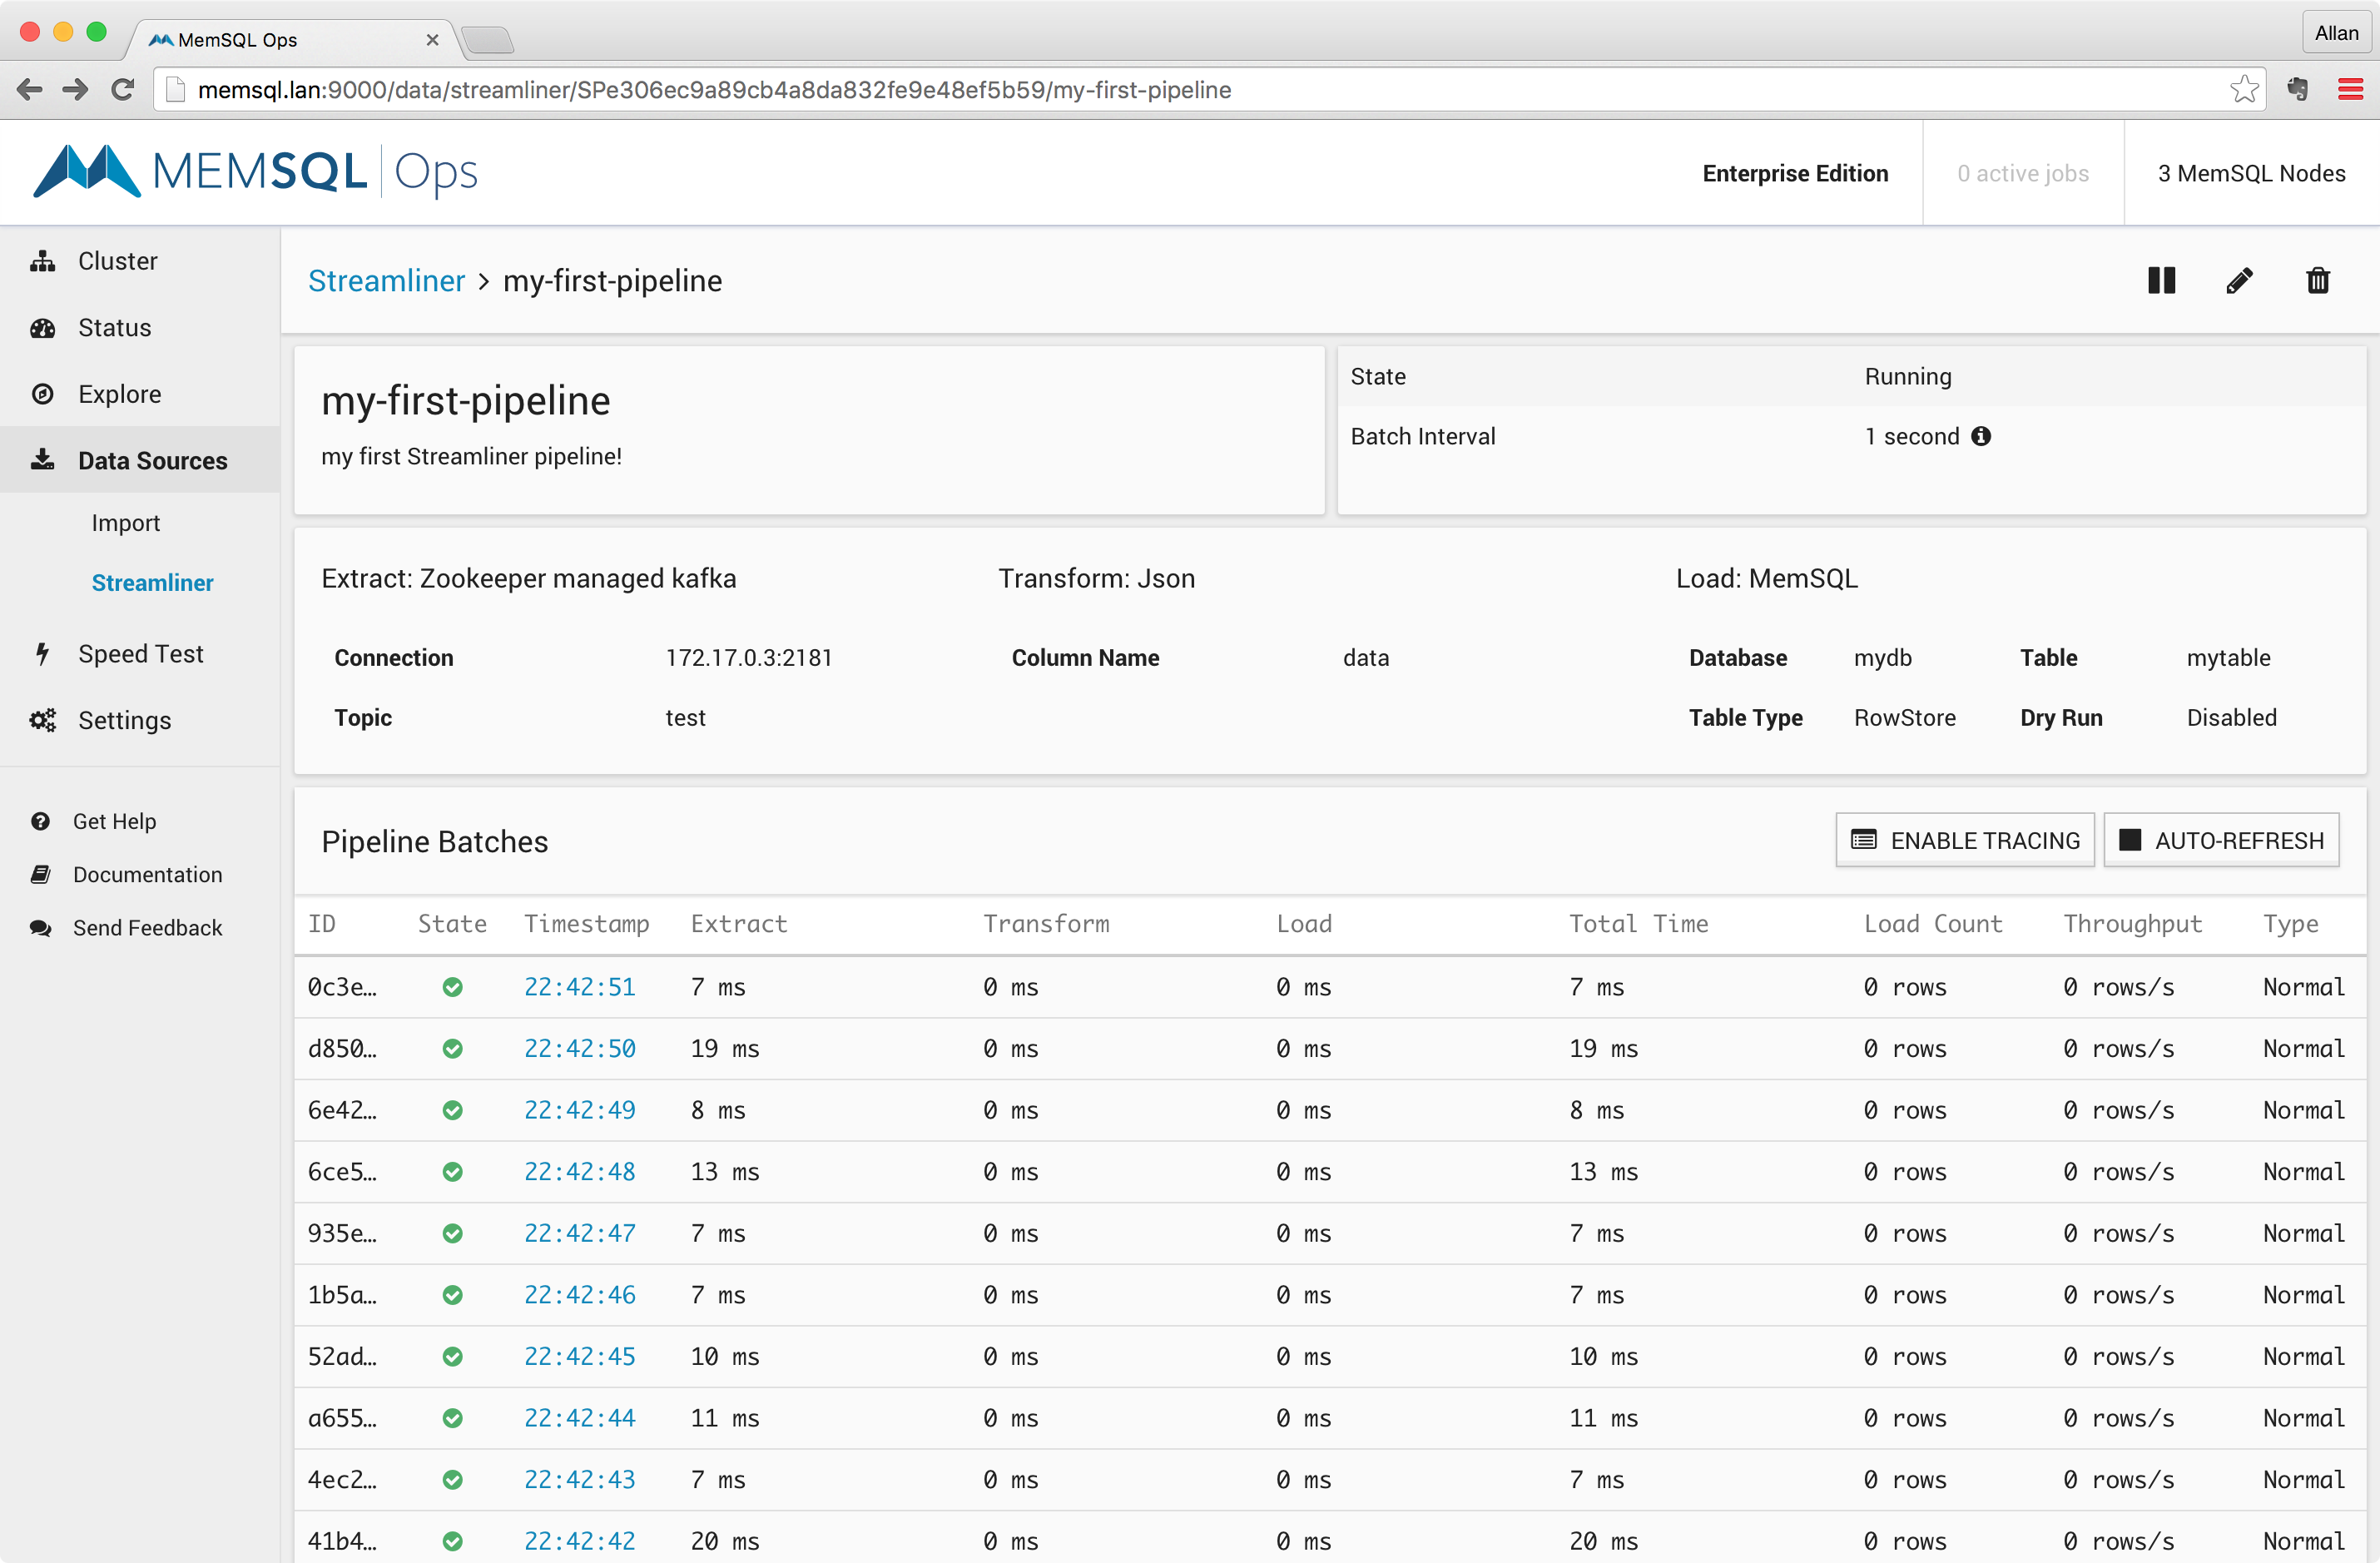
As shown above, you can find information about the state of the pipeline, the different Streamliner phases, and each micro-batch processed in the pipeline.
You can enable tracing in the pipeline by clicking on the Enable Tracing button. Doing so will record all data processed through the Extract and Transform phases of the pipeline for 5 batches, as shown in the screenshot below:
In your Kafka console producer from Step 2, type a few rows. Since we defined a pipeline that receives JSON, make sure the entries are in JSON format. For example:
   {"value":"apple"}
   {"value":"orange"}
   {"value":"banana"}

With tracing enabled and rows inserted through the Kafka console, you should see something like this when you click on one of the traced pipeline batches:
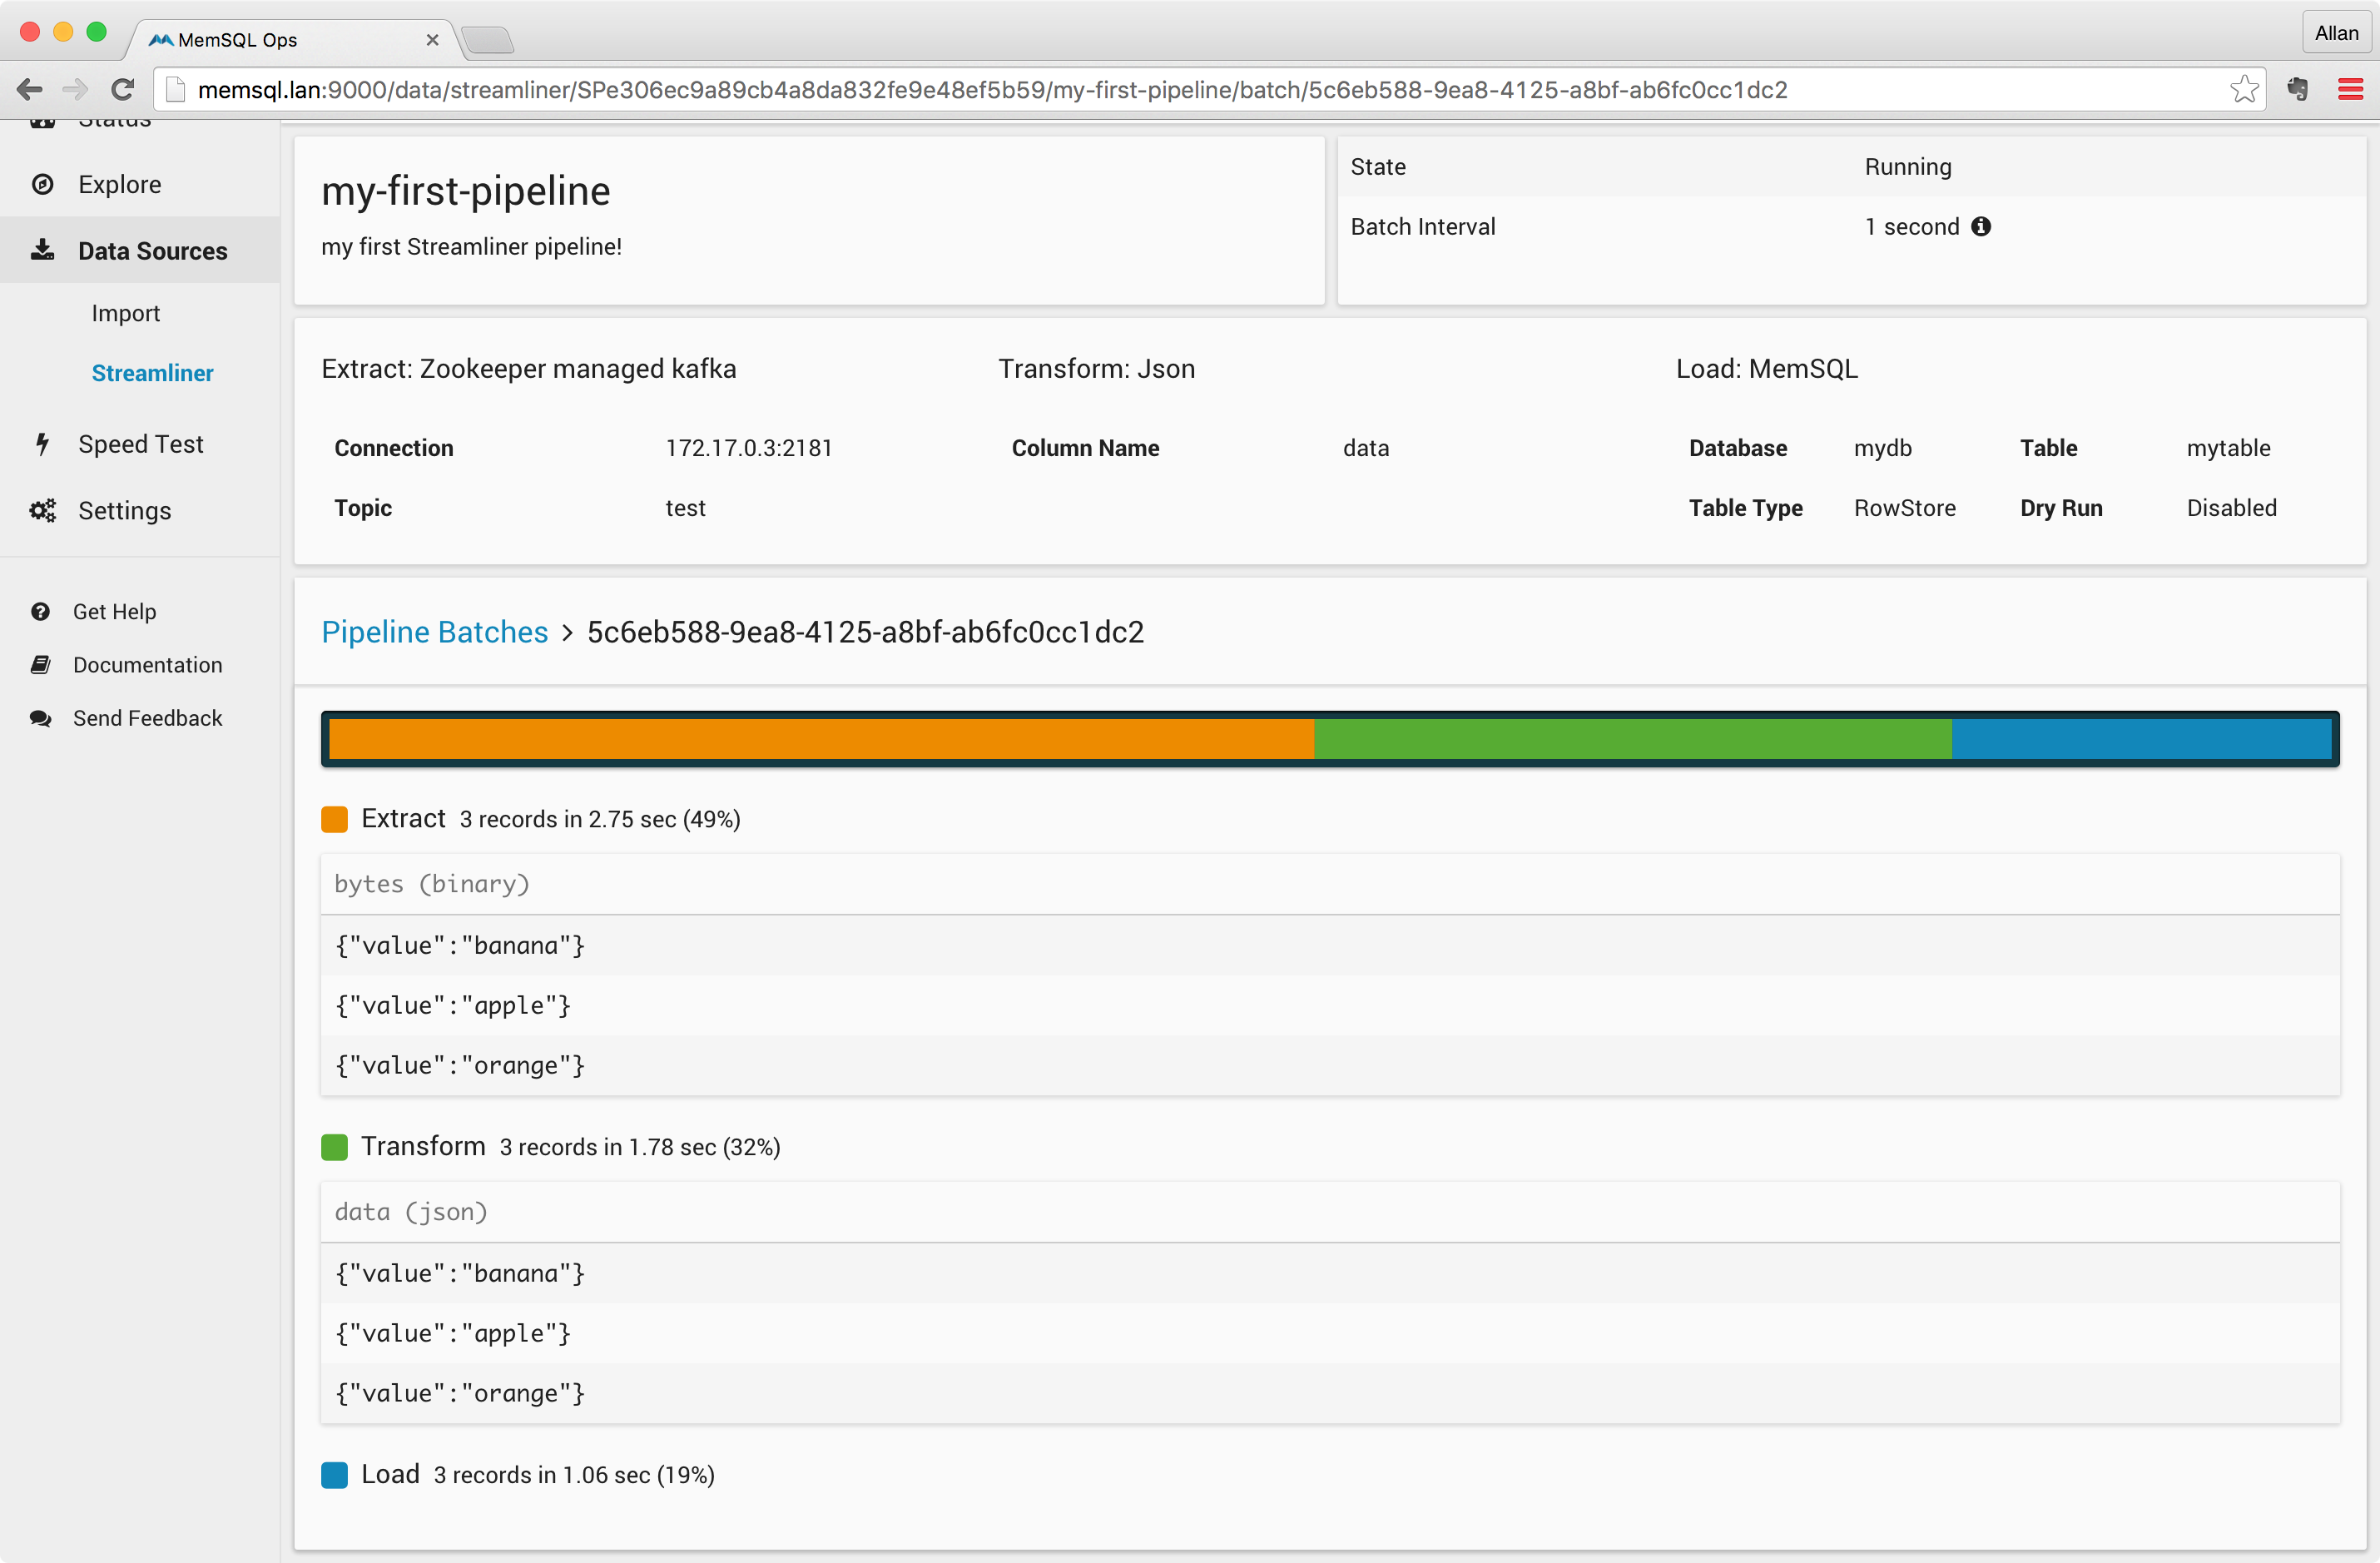
As you can see, each of the Extract, Transform and Load phases are timed and color-coded in the pipeline timeline. Furthermore, since the batch is traced, values from the Extract and Transform phases are printed on the screen.
Finally, verify that rows have been inserted into MemSQL, as shown below:


