This section outlines several ways to connect to MemSQL using popular MySQL-compatible clients and libraries.
MySQL Command-Line Client
MemSQL is wire-compliant with MySQL meaning connecting to MemSQL is as easy as connecting to the MySQL database. You may need the -u user, -h host, and -P port flags to ensure you are connecting to MemSQL properly. For example:
mysql -u root -h 127.0.0.1 -P 3306
Here we have -u root to specify login as user root, -h 127.0.0.1 to connect to the MemSQL host at localhost, and -P 3306 to connect to MemSQL on port 3306. This is the default port setting, which can be changed if needed.
You may also use the --prompt flag to change the prompt in the interactive session, simply to help distinguish MemSQL from MySQL:
mysql -u root -h 127.0.0.1 -P 3306 --prompt="memsql> "
The output when you connect should look similar to this:
Welcome to the MySQL monitor. Commands end with ; or \g.
Your MySQL connection id is 6
Server version: 5.5.8 MemSQL source distribution (compatible; MySQL Enterprise & MySQL Commercial)
Copyright (c) 2000, 2015, Oracle and/or its affiliates. All rights reserved.
Oracle is a registered trademark of Oracle Corporation and/or its
affiliates. Other names may be trademarks of their respective
owners.
Type 'help;' or '\h' for help. Type '\c' to clear the current input statement.
memsql>
These commands show more information about the connection and the server:
mysql> status
--------------
mysql  Ver 14.14 Distrib 5.6.19, for osx10.9 (x86_64) using  EditLine wrapper

Connection id:        6
Current database:
Current user:         root@127.0.0.1
SSL:                  Not in use
Current pager:        stdout
Using outfile:        ''
Using delimiter:      ;
Server version:       5.5.8 MemSQL source distribution (compatible; MySQL Enterprise & MySQL Commercial)
Protocol version:     10
Connection:           127.0.0.1 via TCP/IP
Server characterset:  utf8
Db     characterset:  utf8
Client characterset:  utf8
Conn.  characterset:  utf8
TCP port:             3306
--------------

mysql> show databases;
+--------------------+
| Database           |
+--------------------+
| information_schema |
| memsql             |
| sharding           |
+--------------------+
3 rows in set (0.00 sec)

mysql> show variables like '%version%';
+-------------------------+------------------------------------------------------------------------------+
| Variable_name           | Value                                                                        |
+-------------------------+------------------------------------------------------------------------------+
| memsql_version          | 4.0                                                                          |
| memsql_version_date     | Wed May 6 09:07:03 2015 -0700                                                |
| memsql_version_hash     | 0cba132fba0ba7650c1bc9aeec8c1fc381def395                                     |
| protocol_version        | 10                                                                           |
| version                 | 5.5.8                                                                        |
| version_comment         | MemSQL source distribution (compatible; MySQL Enterprise & MySQL Commercial) |
| version_compile_machine | x86_64                                                                       |
| version_compile_os      | Linux                                                                        |
+-------------------------+------------------------------------------------------------------------------+
8 rows in set (0.03 sec)

mysql> show status like '%license%';
+---------------+----------------------------------+
| Variable_name | Value                            |
+---------------+----------------------------------+
| License_key   | 5ca1ab1e000f40aaa6cb67b2ea3ee466 |
| License_type  | enterprise                       |
+---------------+----------------------------------+
2 rows in set (0.00 sec)

mysql> show status like '%cluster_capacity%';
+--------------------------+-------------+
| Variable_name            | Value       |
+--------------------------+-------------+
| Maximum_cluster_capacity | 10000000 MB |
| Used_cluster_capacity    | 107957 MB   |
+--------------------------+-------------+
2 rows in set (0.00 sec)
The @@version and @@version_comment global variables are for compatibility with MySQL clients, which expect certain minimum version numbers and strings to be present. To check the real version of MemSQL you are running, use the @@memsql_version variables instead. To check the license you are running, see the license_key and license_type status codes.
MySQL Command-Line Client Considerations
-
If using the MySQL 8.x client, you must pass
--default-auth=mysql_native_passwordin your connection string. -
If you also have MySQL installed, the MySQL client may connect to MySQL instead of MemSQL by default if you do not specify the appropriate host and port options. If you attempt to connect to MemSQL on
localhost, even if you specify the correct port, the MySQL client may still attempt to connect to MySQL with default configuration. See this troubleshooting item on ERROR 2002.
For more documentation on the MySQL client, visit the MySQL documentation.
SQLAlchemy
Here is a simple example of how to use MemSQL with the SQLAlchemy Python library:
from sqlalchemy import Column, VARCHAR
from sqlalchemy.ext.declarative import declarative_base
from sqlalchemy import create_engine

Base = declarative_base()
class User(Base):
  __tablename__ = 'user'
  first_name = Column(VARCHAR(200))
  last_name = Column(VARCHAR(200), primary_key=True)


engine = create_engine('mysql://root@127.0.0.1')
engine.execute('CREATE DATABASE db')
engine.execute('USE db')
Base.metadata.create_all(engine)
Flask
Here is a simple example of how to use MemSQL with the Flask Python framework:
## init_db.py

from flask import Flask, g
from memsql.common import database

app = Flask(__name__)

def get_db():
    db = getattr(g, '_database', None)
    if db is None:
        #Make sure that the arguments correspond to your current MemSQL instance.
        db = g._database = database.Connection(host='127.0.0.1', port=3306, user='root')

@app.teardown_appcontext
def close_connection(exception):
    db = getattr(g, '_database', None)
    if db is not None:
        db.close()

if __name__ == '__main__':
    app.run()
Make sure that you have MemSQL Python installed and and instance of MemSQL is running. Using the python connector allows for a very simple way to query the database in a Flask app:
@app.route('/')

def databases():
    cur = get_db()
    return str(cur.query('show databases'))
.sql files can be used to create populate the app with initial schemas:
def init_db():
    with app.app_context():
        db = get_db()
        with app.open_resource('schema.sql', mode='r') as f:
            [db.query(q) for q in f.read().split('\n') if q != '']
Execute this function in a python shell:
>>> from flask_demo import init_db
>>> init_db()
Sequel Pro
This part of the guide assumes that MemSQL is already running with docker.
Open the latest version of Sequel Pro. You can connect to MemSQL using Quick Connect:
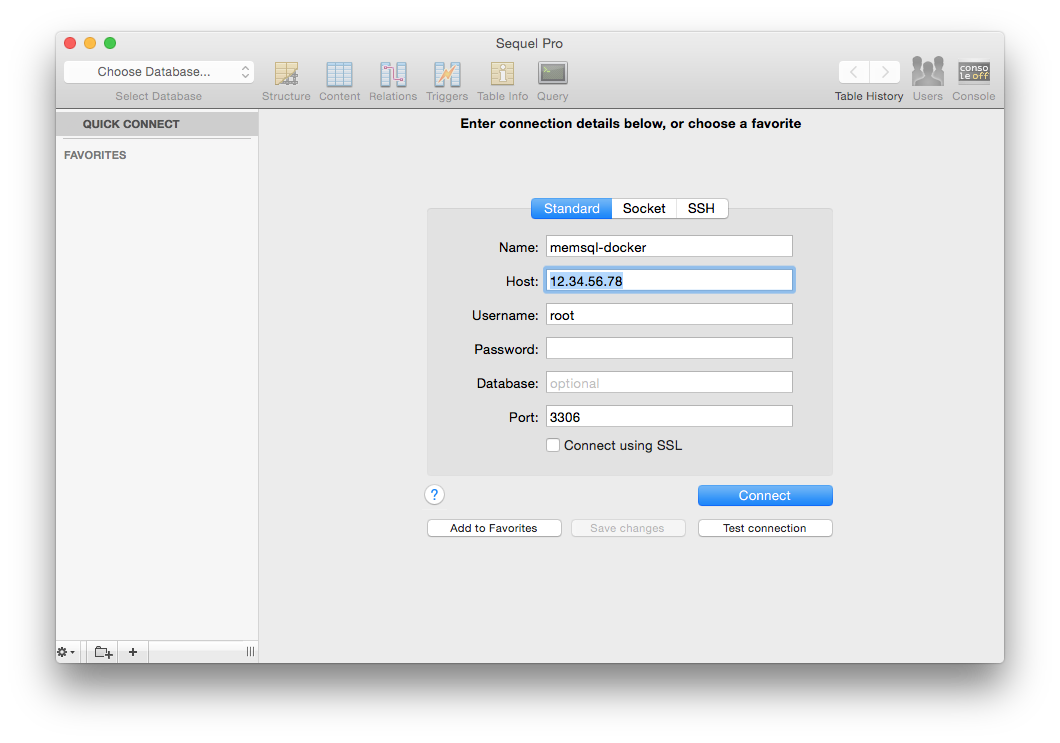
Replace the host field with the IP address of your MemSQL instance. You can find
this using the command boot2docker ip. Click Connect.
Select a database by clicking on the Choose Database... field in the top
left corner. To create your own new database:
-
Select the
Querytab. -
Type the query into the field.
-
Press
Run Previouson the right.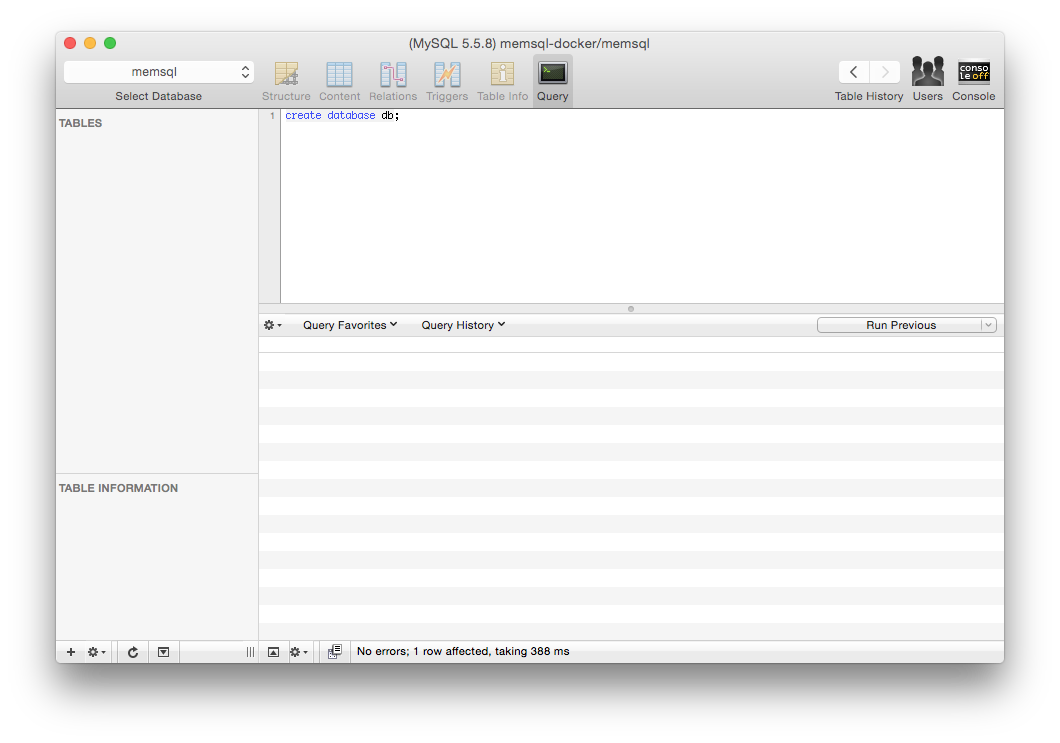
-
If this query was executed correctly, the same message should appear on the bottom of the window.
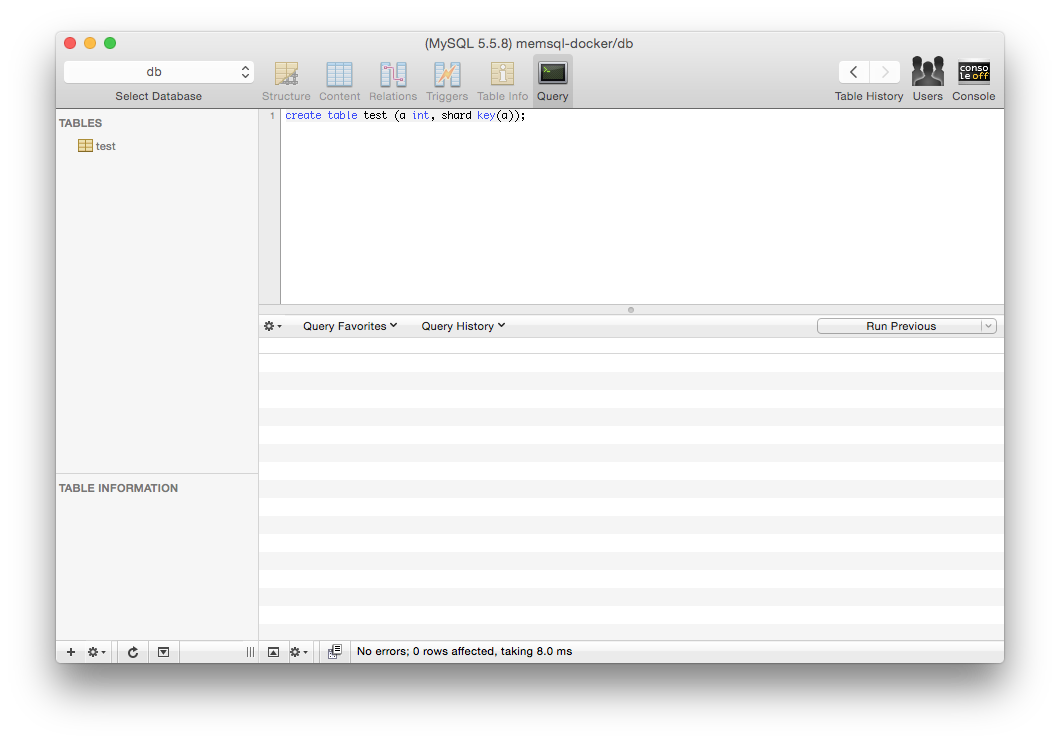
After running a CREATE TABLE query, the tables field on the left side updates:
SQL Workbench
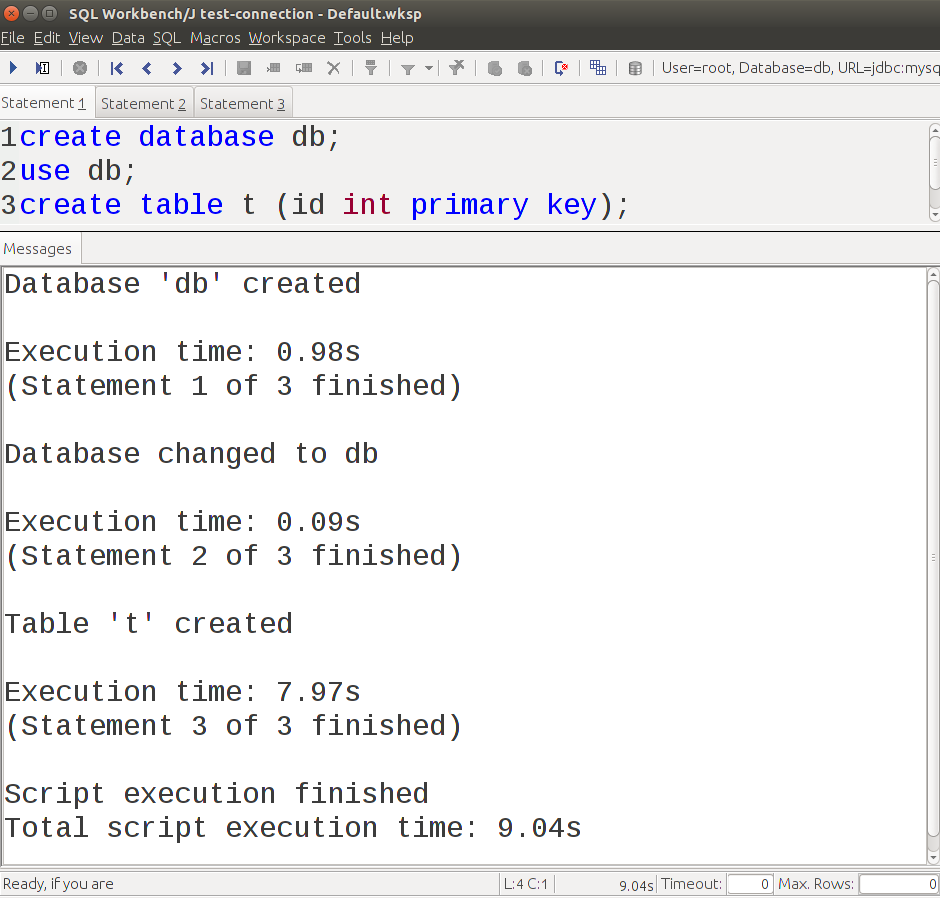
Once you have SQL Workbench installed open the Connectors window. In the Driver drop-down menu select MySQL (com.mysql.jdbc.Driver). This Driver requires the MySQL Java connector. Once you have Driver selected, enter the URL jdbc:mysql://<host>:<port>. By default MemSQL has one user root with no password, so set username to root and leave password empty. Complete the other fields as desired.
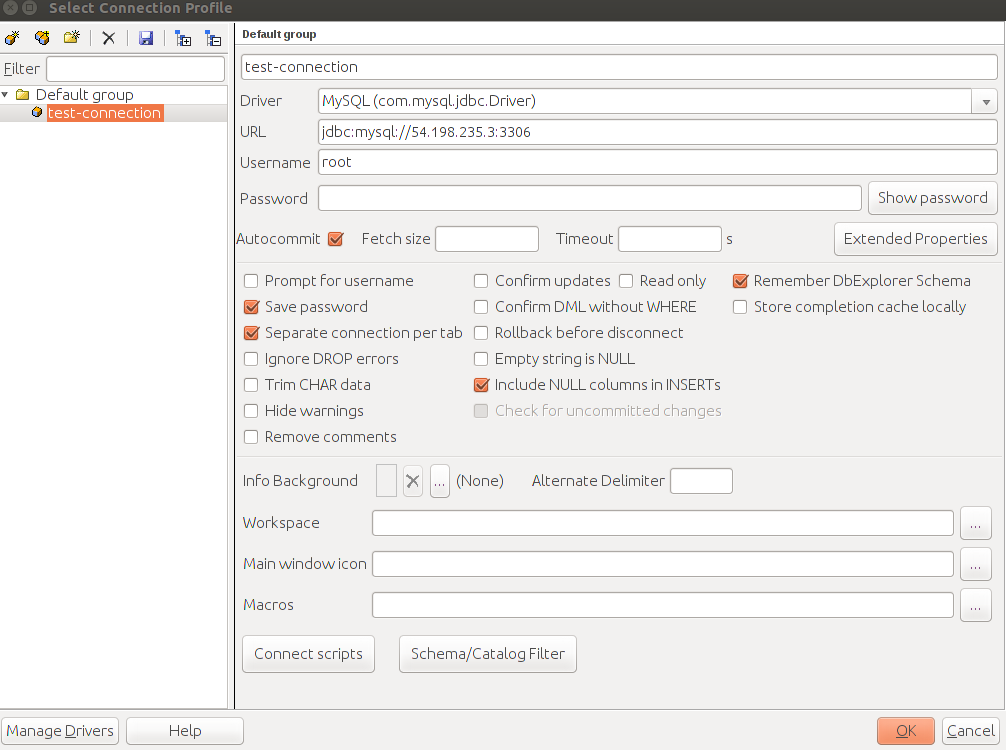
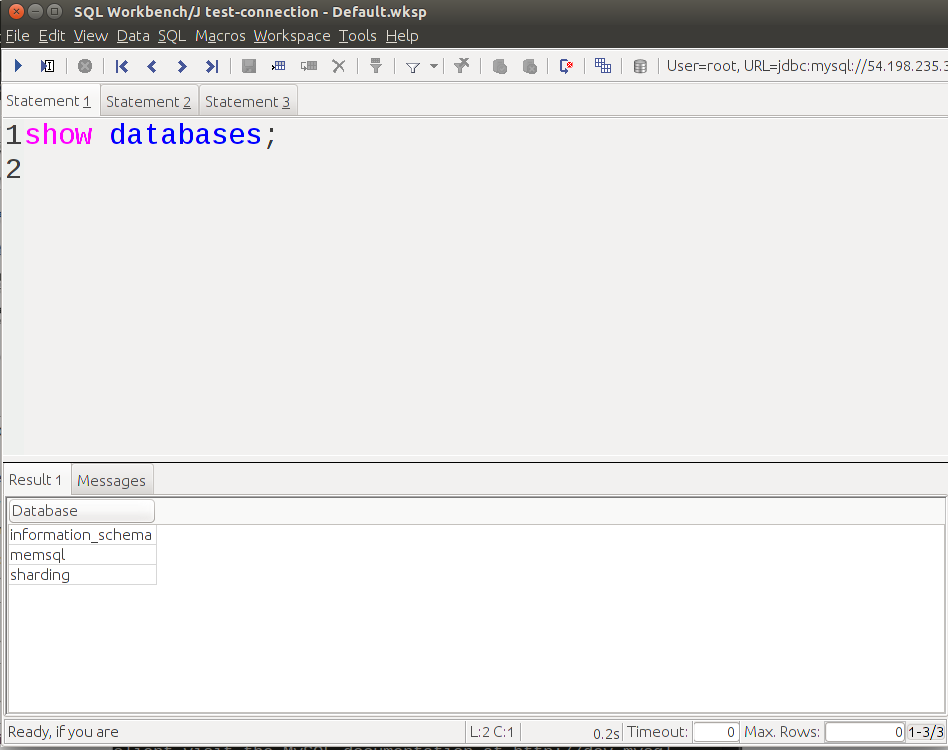
Click OK and the SQL Workbench window will appear. Here you can issue queries in the top window and see results in the bottom window.
PHPMyAdmin
Create PHPMyAdmin database
CREATE DATABASE phpmyadmin;
USE phpmyadmin;

CREATE TABLE `pma_bookmark` (
  `id` int(11) NOT NULL AUTO_INCREMENT,
  `dbase` varchar(255) COLLATE utf8_bin NOT NULL DEFAULT '',
  `user` varchar(255) COLLATE utf8_bin NOT NULL DEFAULT '',
  `label` varchar(255) CHARACTER SET utf8 NOT NULL DEFAULT '',
  `query` text COLLATE utf8_bin NOT NULL,
  PRIMARY KEY (`id`)
);

CREATE TABLE `pma_column_info` (
  `id` int(5) unsigned NOT NULL AUTO_INCREMENT,
  `db_name` varchar(64) COLLATE utf8_bin NOT NULL DEFAULT '',
  `table_name` varchar(64) COLLATE utf8_bin NOT NULL DEFAULT '',
  `column_name` varchar(64) COLLATE utf8_bin NOT NULL DEFAULT '',
  `comment` varchar(255) CHARACTER SET utf8 NOT NULL DEFAULT '',
  `mimetype` varchar(255) CHARACTER SET utf8 NOT NULL DEFAULT '',
  `transformation` varchar(255) COLLATE utf8_bin NOT NULL DEFAULT '',
  `transformation_options` varchar(255) COLLATE utf8_bin NOT NULL DEFAULT '',
  PRIMARY KEY (`id`)
);

CREATE TABLE `pma_designer_coords` (
  `db_name` varchar(64) COLLATE utf8_bin NOT NULL DEFAULT '',
  `table_name` varchar(64) COLLATE utf8_bin NOT NULL DEFAULT '',
  `x` int(11) DEFAULT NULL,
  `y` int(11) DEFAULT NULL,
  `v` tinyint(4) DEFAULT NULL,
  `h` tinyint(4) DEFAULT NULL,
  PRIMARY KEY (`db_name`,`table_name`)
);

CREATE TABLE `pma_history` (
  `id` bigint(20) unsigned NOT NULL AUTO_INCREMENT,
  `username` varchar(64) COLLATE utf8_bin NOT NULL DEFAULT '',
  `db` varchar(64) COLLATE utf8_bin NOT NULL DEFAULT '',
  `table` varchar(64) COLLATE utf8_bin NOT NULL DEFAULT '',
  `timevalue` timestamp NOT NULL DEFAULT CURRENT_TIMESTAMP ON UPDATE CURRENT_TIMESTAMP,
  `sqlquery` text COLLATE utf8_bin NOT NULL,
  PRIMARY KEY (`id`),
  KEY `username` (`username`,`db`,`table`,`timevalue`)
);

CREATE TABLE `pma_pdf_pages` (
  `db_name` varchar(64) COLLATE utf8_bin NOT NULL DEFAULT '',
  `page_nr` int(10) unsigned NOT NULL AUTO_INCREMENT,
  `page_descr` varchar(50) CHARACTER SET utf8 NOT NULL DEFAULT '',
  PRIMARY KEY (`page_nr`),
  KEY `db_name` (`db_name`)
);

CREATE TABLE `pma_recent` (
  `username` varchar(64) COLLATE utf8_bin NOT NULL,
  `tables` text COLLATE utf8_bin NOT NULL,
  PRIMARY KEY (`username`)
);

CREATE TABLE `pma_relation` (
  `master_db` varchar(64) COLLATE utf8_bin NOT NULL DEFAULT '',
  `master_table` varchar(64) COLLATE utf8_bin NOT NULL DEFAULT '',
  `master_field` varchar(64) COLLATE utf8_bin NOT NULL DEFAULT '',
  `foreign_db` varchar(64) COLLATE utf8_bin NOT NULL DEFAULT '',
  `foreign_table` varchar(64) COLLATE utf8_bin NOT NULL DEFAULT '',
  `foreign_field` varchar(64) COLLATE utf8_bin NOT NULL DEFAULT '',
  PRIMARY KEY (`master_db`,`master_table`,`master_field`),
  KEY `foreign_field` (`foreign_db`,`foreign_table`)
);

CREATE TABLE `pma_table_coords` (
  `db_name` varchar(64) COLLATE utf8_bin NOT NULL DEFAULT '',
  `table_name` varchar(64) COLLATE utf8_bin NOT NULL DEFAULT '',
  `pdf_page_number` int(11) NOT NULL DEFAULT '0',
  `x` float unsigned NOT NULL DEFAULT '0',
  `y` float unsigned NOT NULL DEFAULT '0',
  PRIMARY KEY (`db_name`,`table_name`,`pdf_page_number`)
);

CREATE TABLE `pma_table_info` (
  `db_name` varchar(64) COLLATE utf8_bin NOT NULL DEFAULT '',
  `table_name` varchar(64) COLLATE utf8_bin NOT NULL DEFAULT '',
  `display_field` varchar(64) COLLATE utf8_bin NOT NULL DEFAULT '',
  PRIMARY KEY (`db_name`,`table_name`)
);

CREATE TABLE `pma_table_uiprefs` (
  `username` varchar(64) COLLATE utf8_bin NOT NULL,
  `db_name` varchar(64) COLLATE utf8_bin NOT NULL,
  `table_name` varchar(64) COLLATE utf8_bin NOT NULL,
  `prefs` text COLLATE utf8_bin NOT NULL,
  `last_update` timestamp NOT NULL DEFAULT CURRENT_TIMESTAMP ON UPDATE CURRENT_TIMESTAMP,
  PRIMARY KEY (`username`,`db_name`,`table_name`)
);

CREATE TABLE `pma_tracking` (
  `db_name` varchar(64) COLLATE utf8_bin NOT NULL,
  `table_name` varchar(64) COLLATE utf8_bin NOT NULL,
  `version` int(10) unsigned NOT NULL,
  `date_created` datetime NOT NULL,
  `date_updated` datetime NOT NULL,
  `schema_snapshot` text COLLATE utf8_bin NOT NULL,
  `schema_sql` text COLLATE utf8_bin,
  `data_sql` longtext COLLATE utf8_bin,
  `tracking` set('UPDATE','REPLACE','INSERT','DELETE','TRUNCATE','CREATE DATABASE','ALTER DATABASE','DROP DATABASE','CREATE TABLE','ALTER TABLE','RENAME TABLE','DROP TABLE','CREATE INDEX','DROP INDEX','CREATE VIEW','ALTER VIEW','DROP VIEW') COLLATE utf8_bin DEFAULT NULL,
  `tracking_active` int(1) unsigned NOT NULL DEFAULT '1',
  PRIMARY KEY (`db_name`,`table_name`,`version`)
);

CREATE TABLE `pma_userconfig` (
  `username` varchar(64) COLLATE utf8_bin NOT NULL,
  `timevalue` timestamp NOT NULL DEFAULT CURRENT_TIMESTAMP ON UPDATE CURRENT_TIMESTAMP,
  `config_data` text COLLATE utf8_bin NOT NULL,
  PRIMARY KEY (`username`)
);
Install Apache2 and PHP5
$ sudo apt-get update
$ sudo apt-get install apache2
$ sudo sh -c 'grep -q "^ServerName  *localhost$" /etc/apache2/httpd.conf ||
    echo "ServerName localhost" >> /etc/apache2/httpd.conf'
$ sudo apt-get install php5 php5-mysql
$ sudo /etc/init.d/apache2 restart
Install PHPMyAdmin
$ sudo apt-get install phpmyadmin
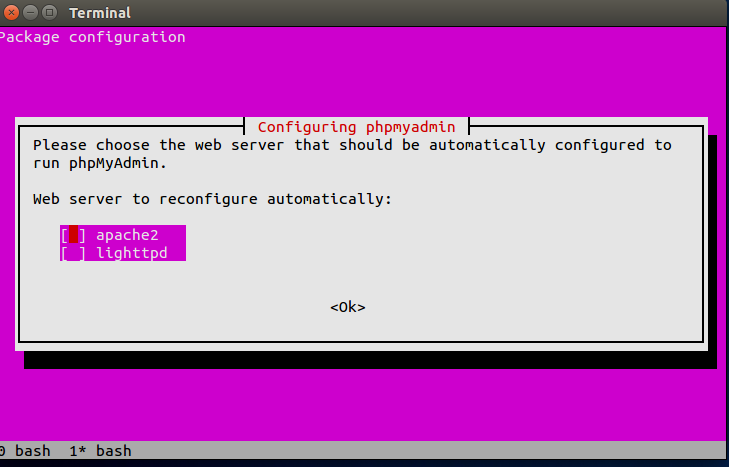
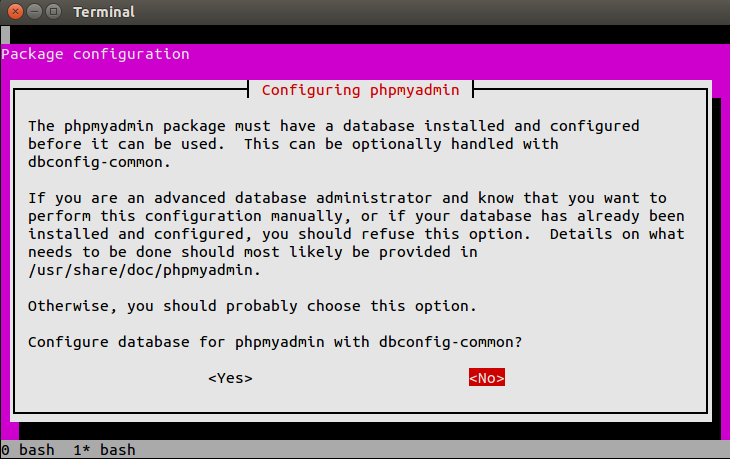
The installer will display two dialogs: one dialog asks which webserver you’re using, and the other dialog asks if you want dbconfig-common to automatically configure your database. These dialogs might appear in a different order than is shown here.
For the dialog that asks which webserver you’re using, choose Apache2 and press enter.
For the dialog that asks if you want dbconfig-common to automatically configure your database, choose No and press enter.
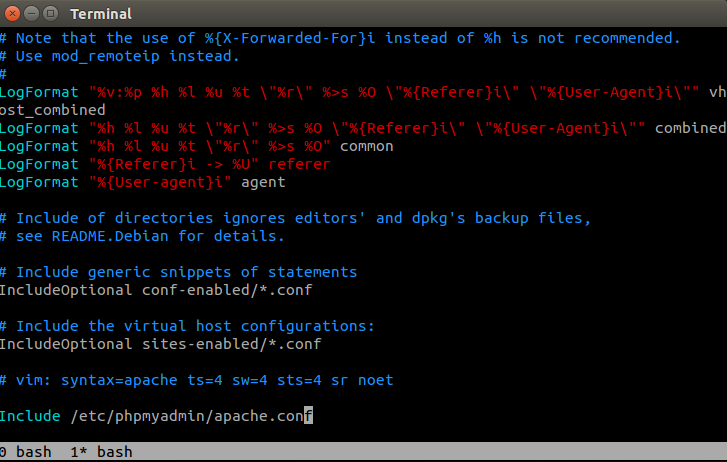
Edit /etc/apache2/apache2.conf and add the line “Include /etc/phpmyadmin/apache.conf”
Edit /etc/phpmyadmin/config-db.php to have the following fields set.
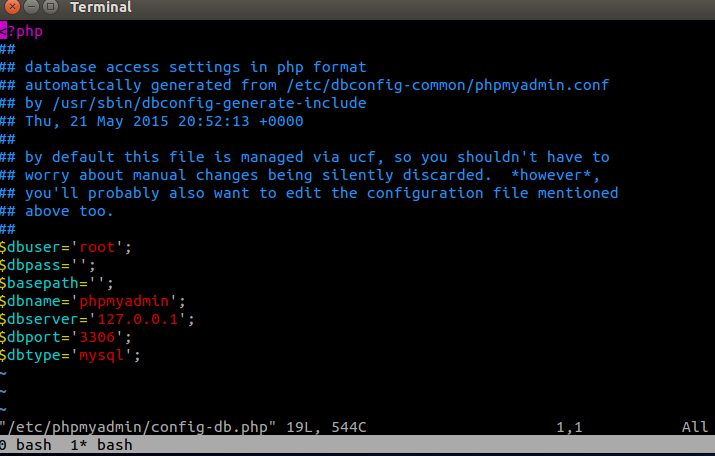
$dbuser and $dbpass should be set to the user name and password for connecting to MemSQL. Do not set $dbname to ‘'. If MemSQL is running locally set $dbserver to '127.0.0.1' instead of 'localhost'.
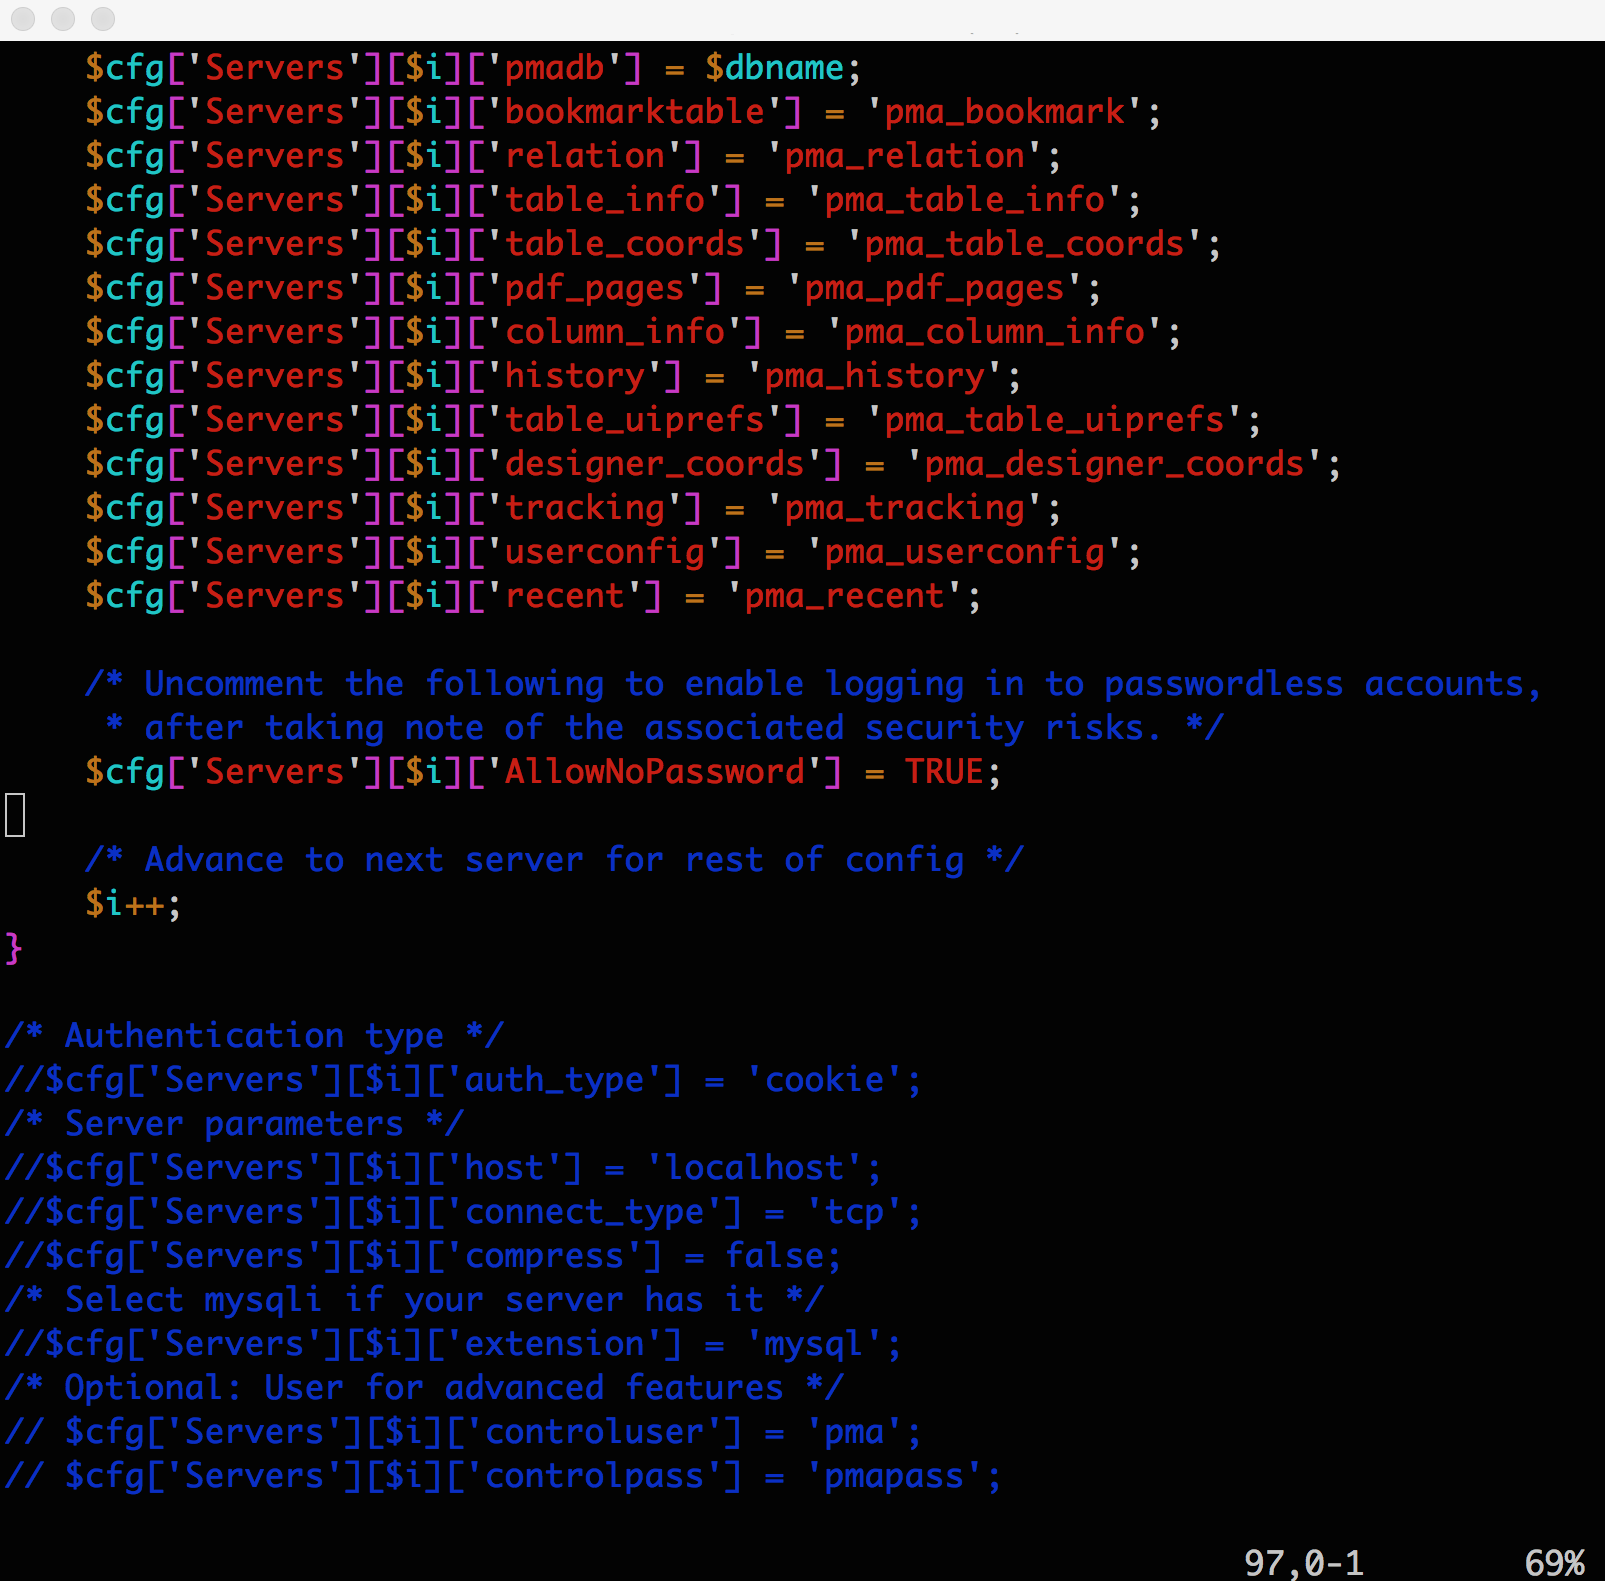
If $dbpass is '’ then you need enable the AllowNoPassword option. To do this, open /etc/phpmyadmin/config.inc.php, find the first occurrence of AllowNoPassword, and uncomment that line.
Finally, restart Apache2:
$ sudo /etc/init.d/apache2 restart
Using PHPMyAdmin
Congrats! You have now installed PHPMyAdmin backed by MemSQL. Connect to PHPMyAdmin by visiting http://hostname/phpmyadmin. Enter the user name and password for connecting to MemSQL (same as $dbuser and $dbpass from /etc/phpmyadmin/config-db.php).
Ruby On Rails
Configuring MemSQL
Open config/database.yml and edit the development adapter to use MySQL. You will need to have the MemSQL socket which can be found using the query show variables like 'socket'.
$ mysql -u root -h 127.1 -P 3306 -e "show variables like 'socket'"

+---------------+---------------------------------------------------------------------------------------+
| Variable_name | Value |
+---------------+---------------------------------------------------------------------------------------+
| socket | /var/lib/memsql-ops/data/installs/MI85eaf8fca04849888be7f1a9a596210e/data/memsql.sock |
+---------------+---------------------------------------------------------------------------------------+
Querying Your Database
MemSQL can be queries using the mysql2 connector in controller code. Calling execute returns a mysql2 result which can be converted to an array and easily displayed:
class WelcomeController < ApplicationController
  def index
    render plain: ActiveRecord::Base.connection.execute('show databases').to_a.join(' ')
  end
end

